
This is going to be very long, and picture heavy, so be warned.
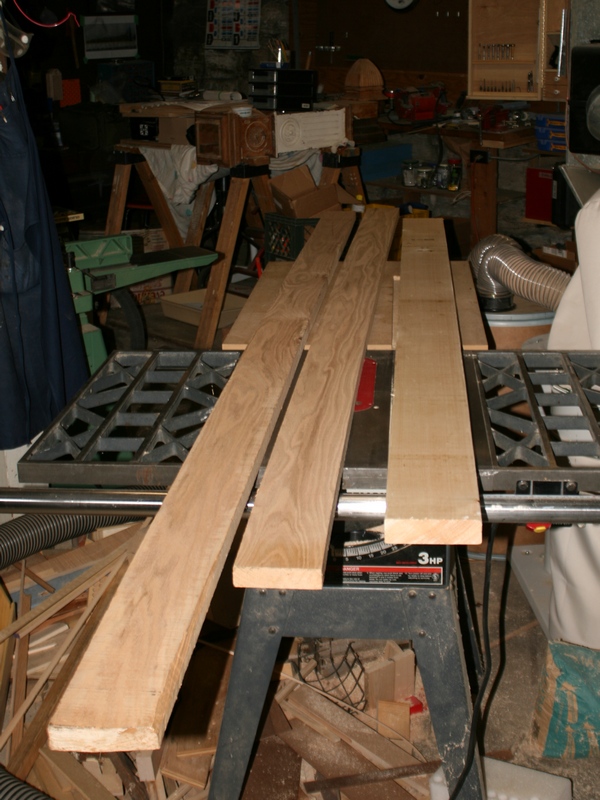
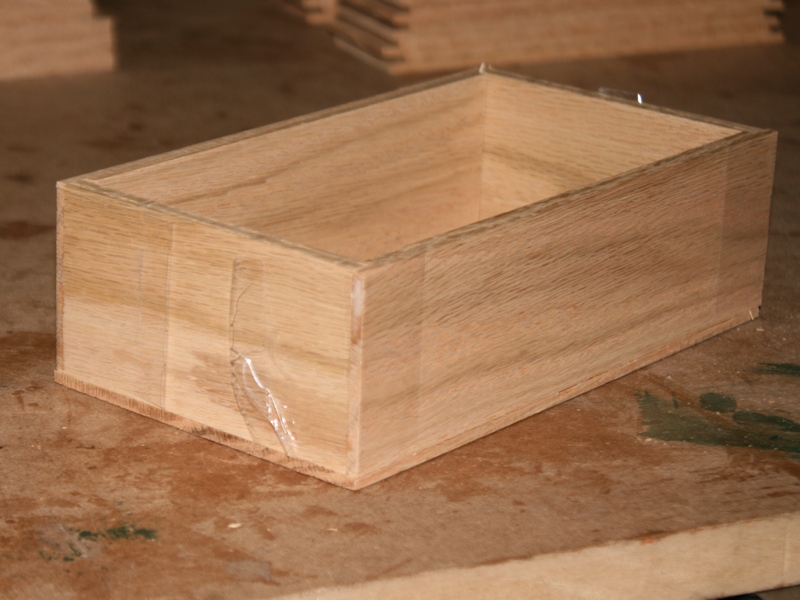
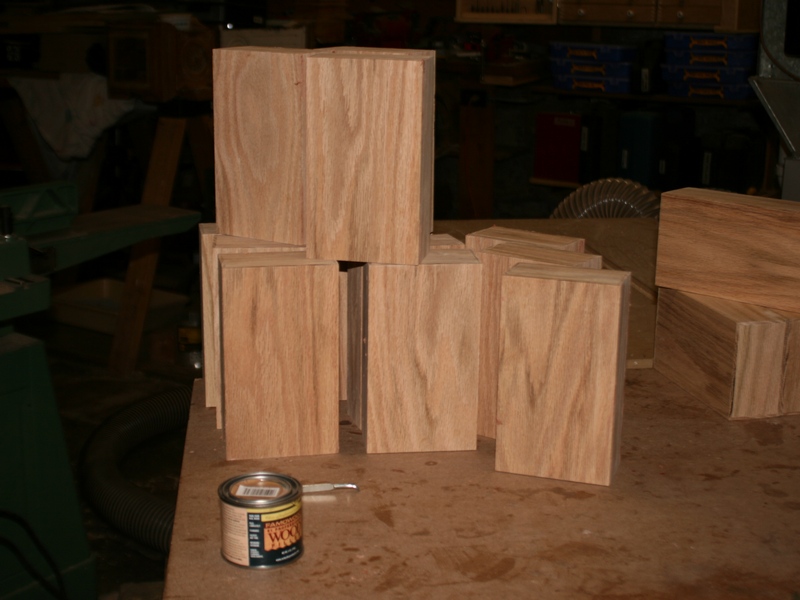
This post is how I go from these raw materials:
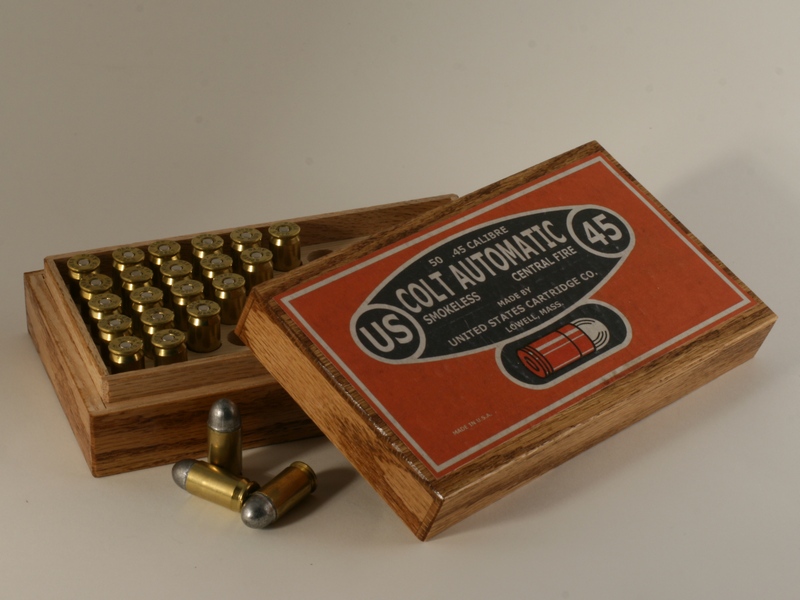
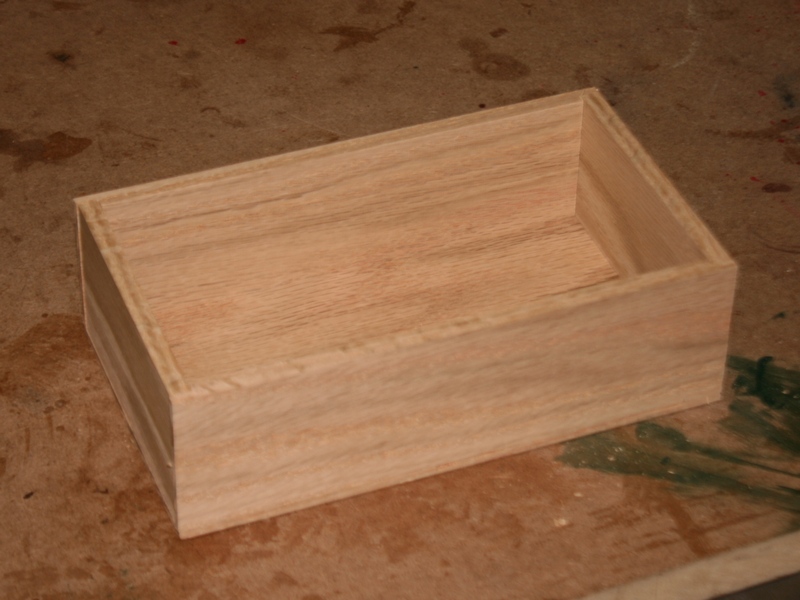
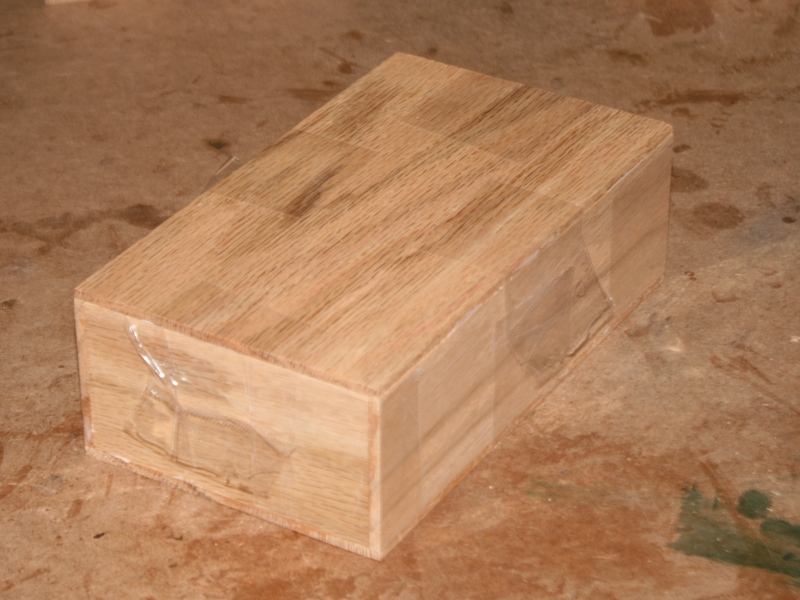
to this finished product:
So, if you are interested, join me below the fold for our journey.
Warning:
Woodworking power tools are dangerous. You need to pay careful attention to what you are doing. I do not have guards on my tablesaw which many people feel is unsafe. If you are new to woodworking please understand that what works for me may not be safe for you.
Additional Note:
This guide is not meant as an all expansive woodworking how to. I make many assumptions about basic woodworking knowledge. If you do not know how to run any of the tools I am showing you, please get someone to show you how. Please feel free to ask me for clarification of any steps, but again, I’m not trying to teach basic woodworking skills here.
Step One – Stock Preparation
The stock I buy is 5/4 thick oak. The inserts are made out of a 2×6 – I just look for the clearest ones I can find at Home Depot.
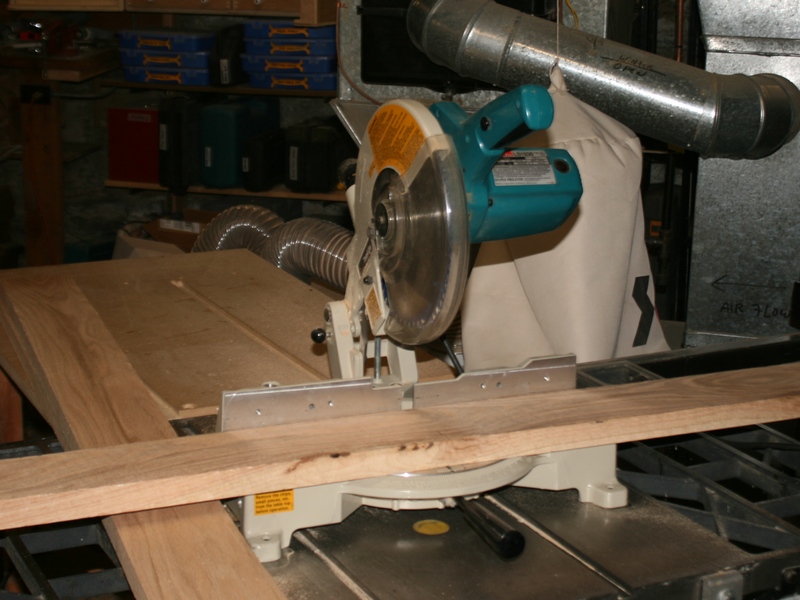
I don’t like dealing with 8 foot pieces – it’s just a hassle – so I grab my chop saw and cut them in half. It does create more waste, since my planer snipes the ends of the boards, but it’s what I do.
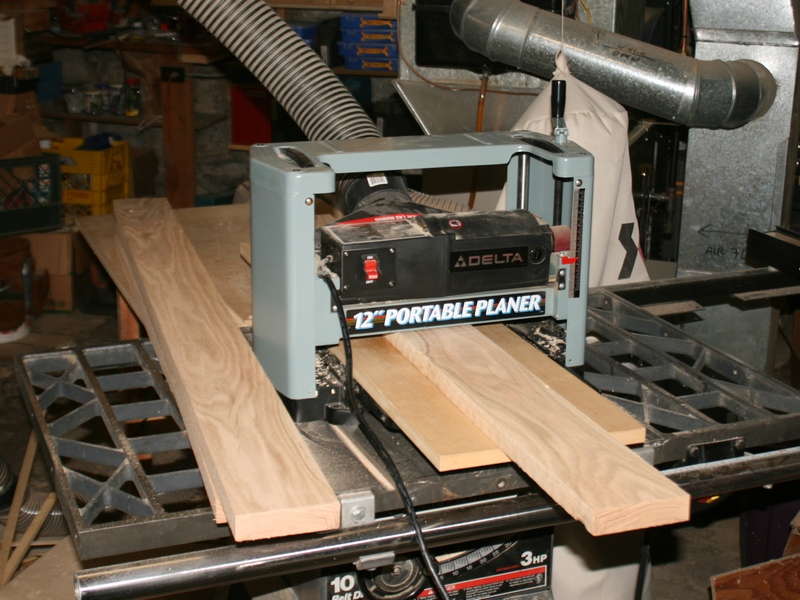
The stock I purchased was planed on one side (well, partially planed on both sides) so I ran it though the planer to true it up. I’m not really concerned with thickness at this point, but I only take off enough to clean up the surfaces.
Then I joint one edge so that I have a flat to run on the bandsaw for resawing. You can see the bow in this piece as it sits on the jointer.

The next step is to resaw the boards into pieces that are about 5/16″ – 3/8″ thick. I make my boxes out of 1/4″ stock, so I leave enough to clean up the bandsaw marks. I can usually get three pieces out of a 5/4 board. It’s okay if a couple come out a little undersized as we need some 1/8″ stock too.


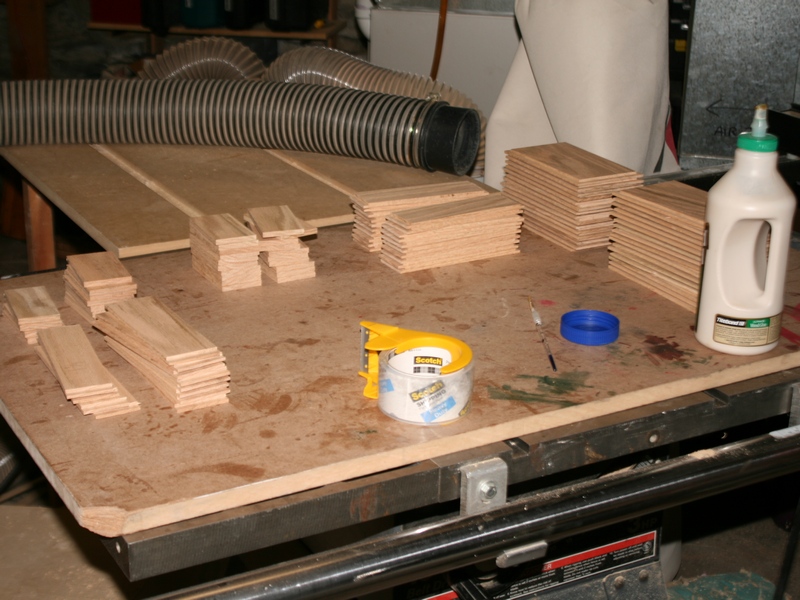
These are all the resawn pieces:

After resawing, I plane the pieces to thickness. I make most of them 1/4″ thick, but I also make two or three pieces that are 1/8″ thick for the insides of the boxes. I didn’t take another planer photo, so imagine it.
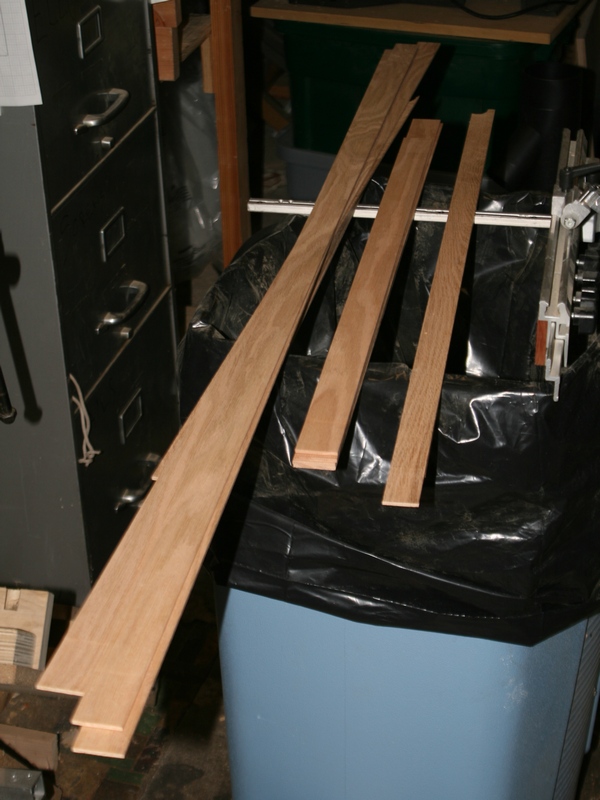
Here are the finished boards.

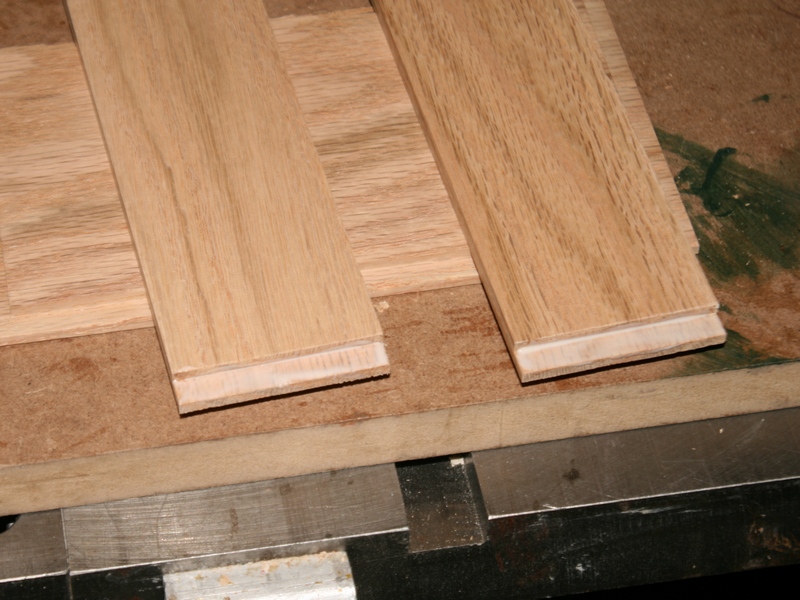
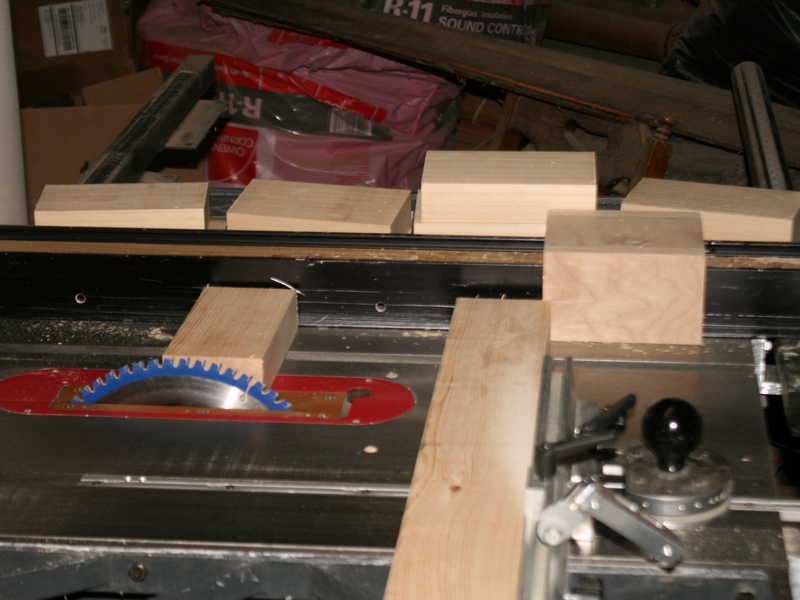
Step Two – Rip to Width
After prepping the stock, I rip it to width. My boxes are usually 4″ x 7″ x 2″, so I rip the stock to 4″ and 2″. Make sure you run the jointed edge along the fence. Use a push stick for narrow pieces (you can see mine in the second photo.)
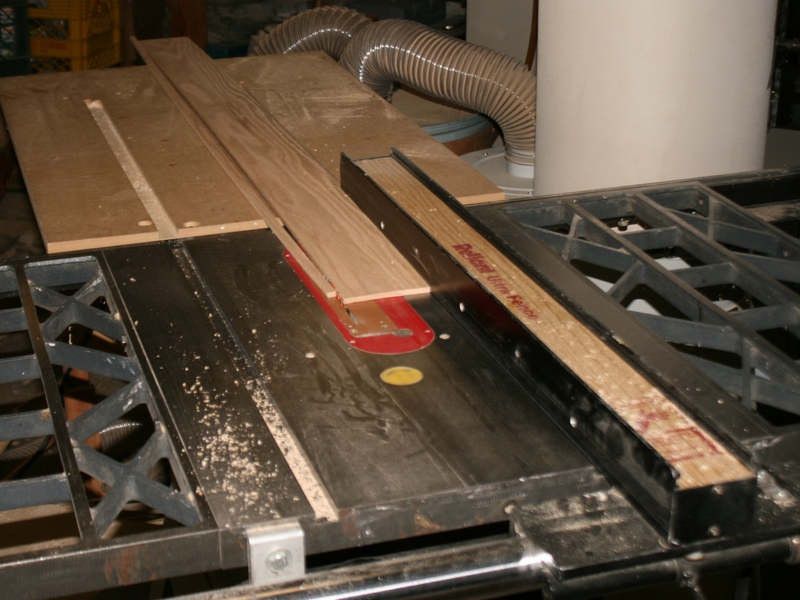
Step Three – Cut to Length
Next I haul out my table saw sled and cut the pieces to length.
I like to use setup blocks for setting the length. The ones in this photo are called 1-2-3 blocks because they are 1″ x 2″ x 3″. They are very accurate (usually +/- .005″ for the cheap ones.) I also have a set of Veritas setup blocks that I use for smaller dimensions.
Since my boxes are 7″ long, I set the stop for 7″.

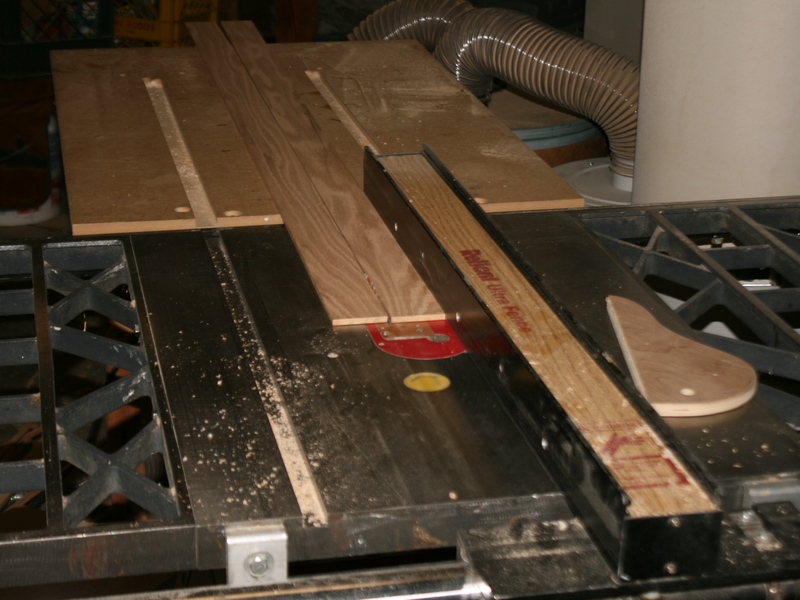
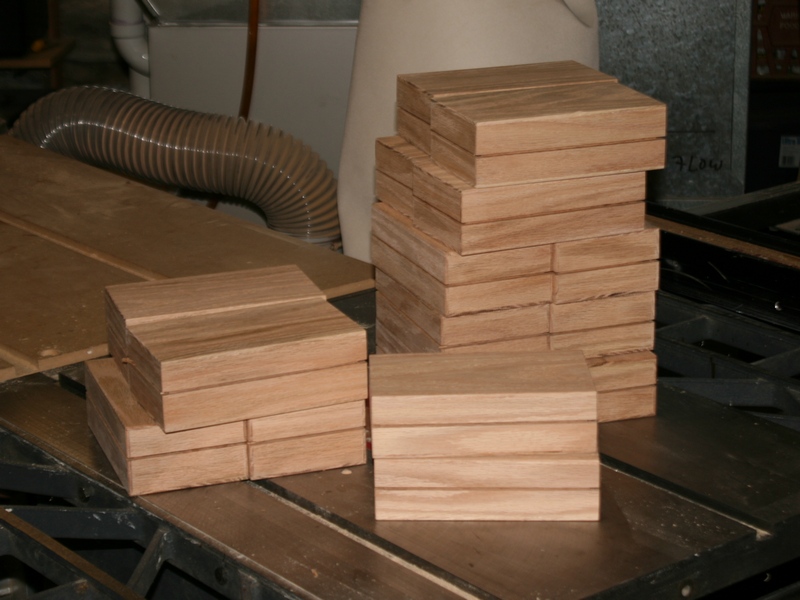
Here are all the tops and bottoms – 32 of them since I am making a batch of 16 boxes.
I leave the sled set for 7″ and proceed to cut the fronts and backs out of the 2″ wide stock. Again, 32 of them.

Next I set the stop for 3-3/4″. The boxes are 4″ wide and I am going to rabbet the ends 1/8″ into the front and back, so the ends need to be 3-3/4″ long. The 3/4″ block in the photo is from the Veritas setup block set.
And here are all the parts for 16 boxes.

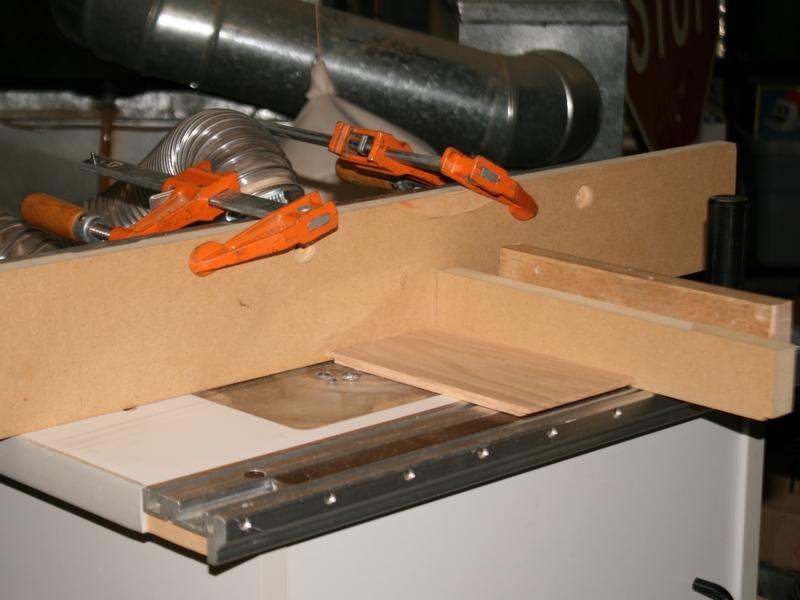
Step Four – Route the Rabbets
I setup the router table with a 1/2″ bit and set the depth to half the thickness of the stock (1/8″). Then I set the fence for a cut equal to the thickness of the stock (1/4″). I use a piece of scrap to make test cuts until the bit is set the way I want it.
Then I use a miter gauge and a backing block to minimize the tearout on the wood and route both ends of the front and back pieces.

Next using the same miter gauge I route the end grain of the tops and bottoms. I use the same setting on the bit and fence.
Then I route the sides of the tops and bottoms. I do that without the miter gauge. No photo.
Step Five – Glue Up
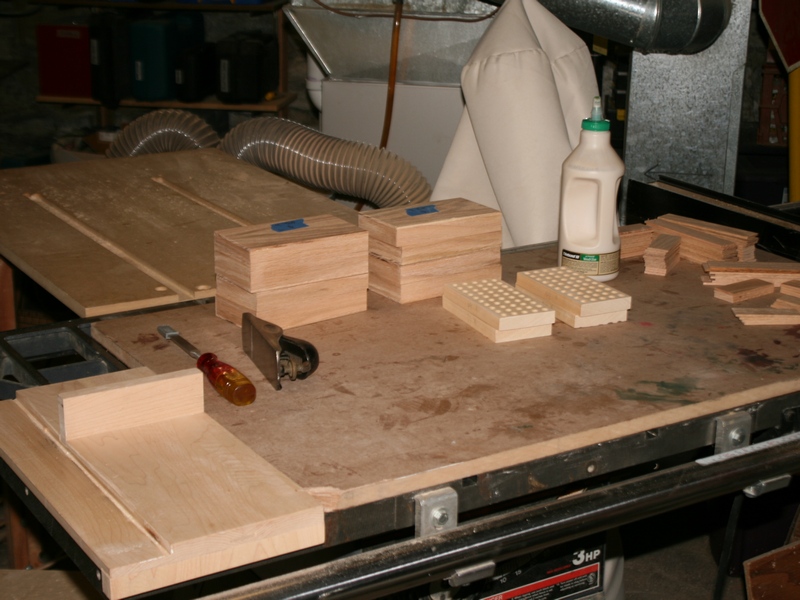
All the parts and materials needed for the glue up: glue, a small paint brush, and clear packing tape.
Ready to glue up a box. I grab a top/bottom, two ends and two sides.

I put glue in the rabbets on the end pieces – I do not glue it to the top at this point, I’m just going to use the top as an assembly jig.
I fit the sides and ends together, setting them on the top to keep them square. The glue will hold them while I grab the packing tape.
Then I take pieces of packing tape – about 2″-3″ long – and tape all the corners. I stretch the tape as I pull it around the corner and it makes a nice tight clamp.
Pro Tip: Fold over the end of the tape when you apply it to the box and it makes it much easier to peel it off again.
Next I grab a top/bottom piece and put glue in the rabbets. Pop it on top of the sides and tape it in four places.

Flip the box over, rinse and repeat to glue the bottom on.
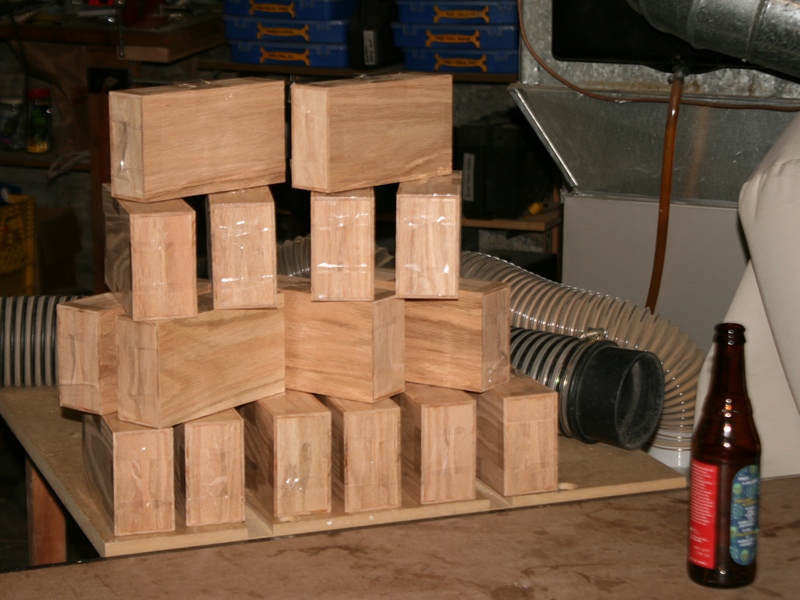
And you have a box. Repeat until you run out of parts, beer or patience.
Let the glue dry and then peel off the tape. I didn’t take photos since a photo of glue drying would pretty boring. If you need one, look at the previous photo and use your imagination.
Step Six – Clean Up
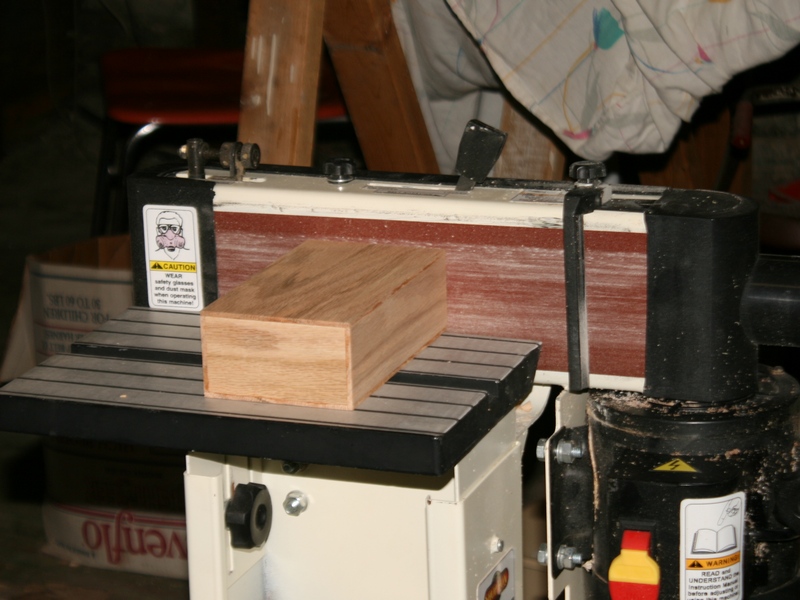
After removing all the tape I clean up the glue and any misalignment with my belt sander. I sand all four sides and the top and bottom if they need it.
Then I grab some wood filler and fill in any cracks in the joints. Sometimes they are not completely tight.
After the filler dries I use a sanding block to sand down the excess. Then I use my block plane to put a light chamfer on all the edges.

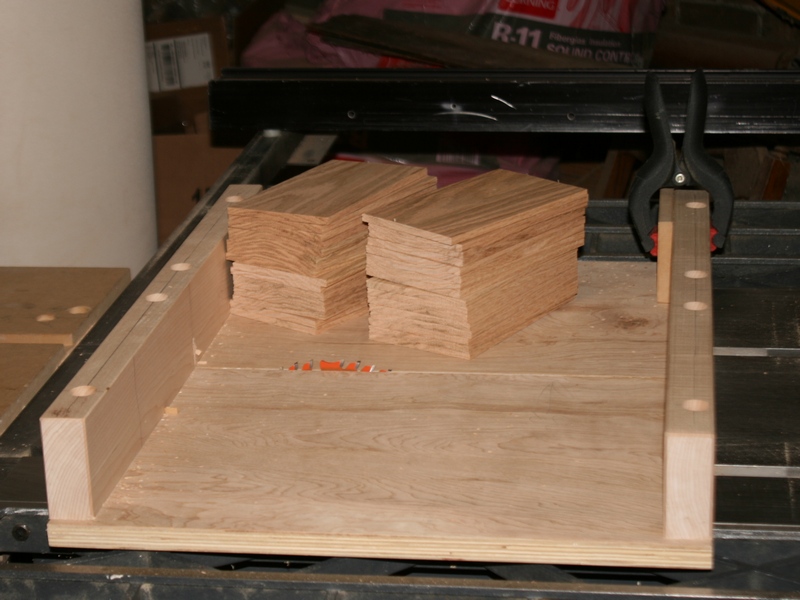
Step Seven – Cut the Insert Blocks
Now we move on to the inserts.
I make the inserts out of the clearest 2x that I can find at Home Depot. This trip I found a really nice 2×6, so I ripped it to width and cut blocks from it.
What size are these blocks? Well, the boxes are 4″ x 7″, subtract 1/2″ for the two sides, then another 1/4″ for the lid retaining strips (we’ll get to those later) and you end up with 3-1/4″ x 6-1/4″.
So I rip the 2×6 to 3-1/4″ and then cut 6-1/4″ blocks from it. I used my miter gauge and a stop on the fence instead of my sled because the blocks are 1-1/2″ thick.
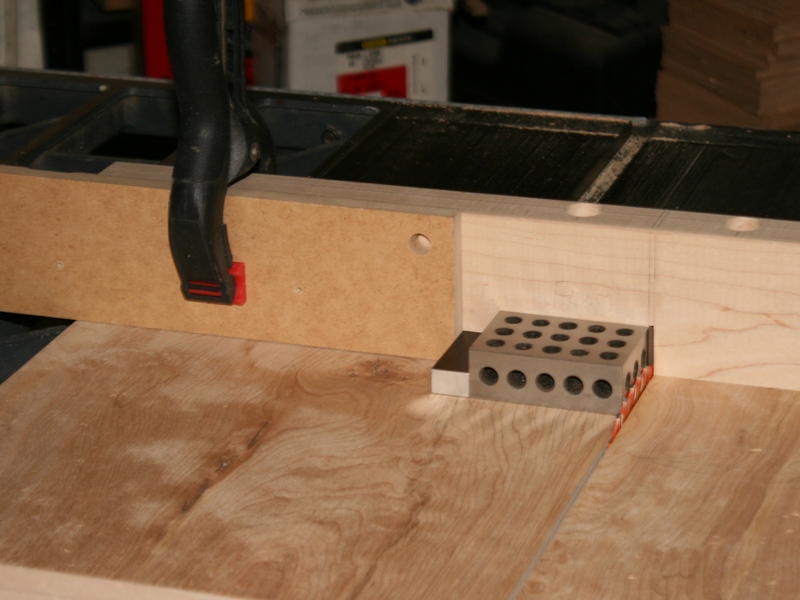
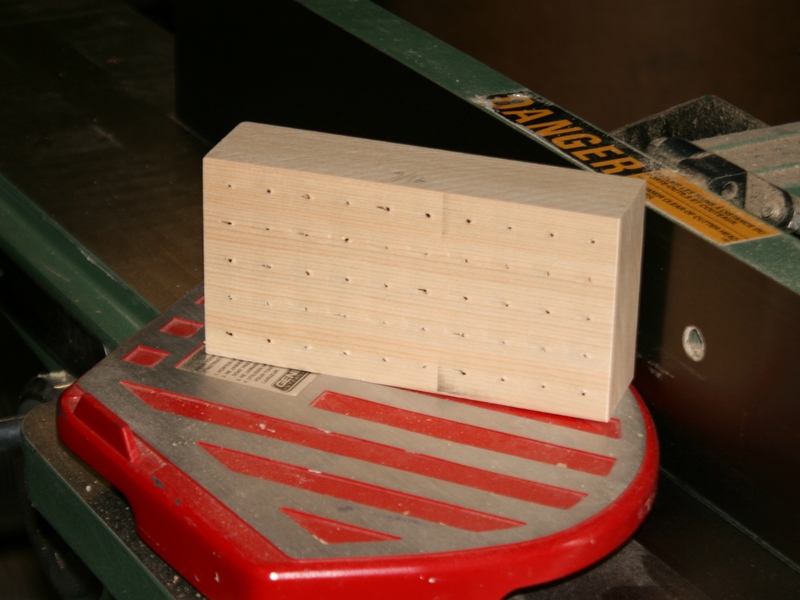
Step Eight – Drill the Insert Blocks
I set the fence and a stop block to the appropriate location for the first hole and chuck up whatever size bit I need. To avoid blow out I set the depth stop so the bit doesn’t quite touch the table.
Pro Tip: Since I make a lot of these boxes I made a setup template out of 3/4″ MDF the same size as the blocks and drilled the starting hole in it. To set the fence and stop I chuck up the bit that I drilled the starting hole with, lock it down in the hole in the template and then set the fence and stop against the template.
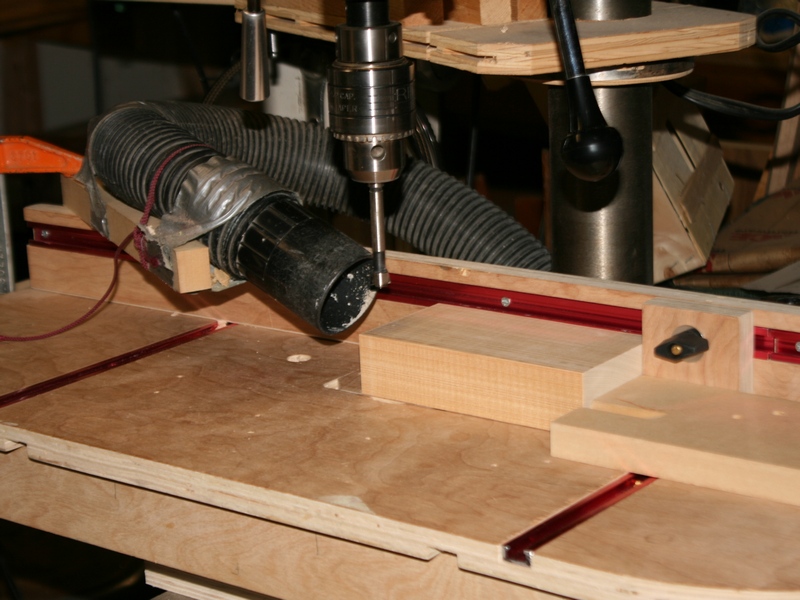
Turn on the drill and go to work. Here you can see how I space the holes. I ripped a bunch of MDF to the same width as the hole spacing. I drill a hole, slide the block over, insert a spacer and drill the next. These spacers are 5/8″ wide.

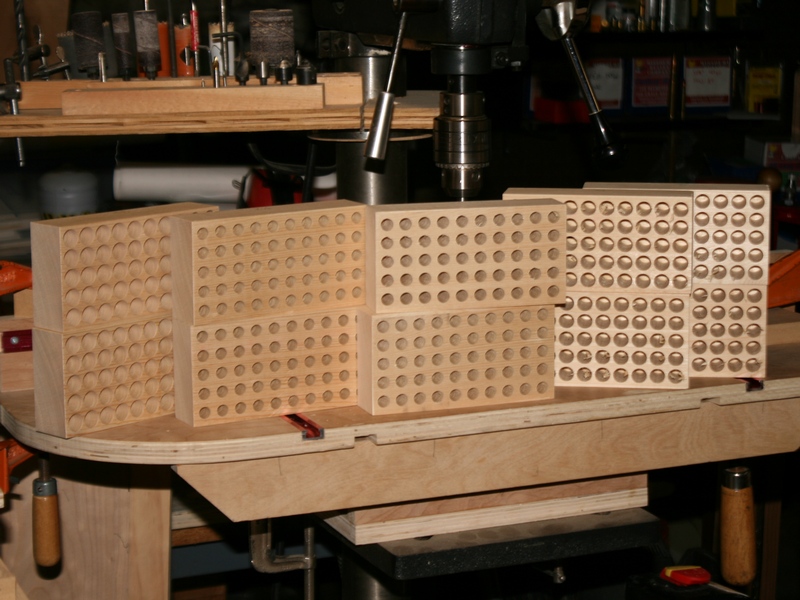
Here are 10 blocks drilled in various sizes. Each block will make two inserts. I ended up with 10 due to the quantities of the various hole sizes I needed. Besides, it doesn’t hurt to have extras.
Here is the back of a block after drilling. You can see the tip of the Forstner bit has just poked through, but the hole has stopped short.
Note: If you drill holes larger than 1/2″ (for .50 AE say) then the blocks get pretty fragile. Even 1/2″ holes can make it pretty fragile. Be forewarned.
Step Nine – Clean Up the Backs
I still don’t have a great way to do this completely figured out. I have tried a couple of things and they both have their drawbacks.
If I run them across the jointer I tend to get chunks torn out between the holes no matter how light a cut I take. And if the holes are large so there are skinny webs between them it can destroy the block.
If I put them on the belt sander it takes a while and I have to be careful to sand the backs off evenly. But this appears to be the best method.
I don’t have a photo for this part – well, I do have a photo of a block sitting on the jointer, but it’s not very exciting and you’ve already seen my jointer.
Step Ten – Resaw the Inserts
Since the inserts are 1-1/2″ thick we can get two inserts out of each block. I set the fence on my bandsaw so the blade is centered in the block and resaw them all in half.

After resawing I clean up the saw kerfs on my belt sander. Again, no photo.
Step Eleven – Cut Off the Tops
Back to the boxes again. Now we cut the tops off.
I use a piece of scrap to set the table saw depth of cut to just under the thickness of the sides.

Then I set the fence to the height that I want the bottom to be and cut all four sides of the box. For some reason I neglected to take a photo of this.
Here are all the boxes after cutting.
After running the boxes over the table saw I use a utility knife to part the top from the bottom and a chisel to clean up the thin material left over. Again, no photo here.
Step Twelve – Cut the Lid Retaining Strips
Here is where I use the 1/8″ material I made earlier. Measure the inside depth of the bottom and add 3/8″ (assuming you left at least 3/8″ for the lid.) Rip the 1/8″ material to that width.
This is what you end up with – I have three different widths since I’m making boxes that are three different heights.
Next I use my table saw sled again and cut the strips so they fit inside the boxes. The long ones are 6-1/2″ and the short ones are 3-1/4″.
No picture, but you can use the earlier one of my sled if you like.
Step Thirteen – Final Assembly
Here are the parts you need to put the boxes all together. Boxes, inserts, and lid retaining strips.
I like to put a little bevel on the edge of the strips to make it easier to get the lid on. Just a few passes will do it.
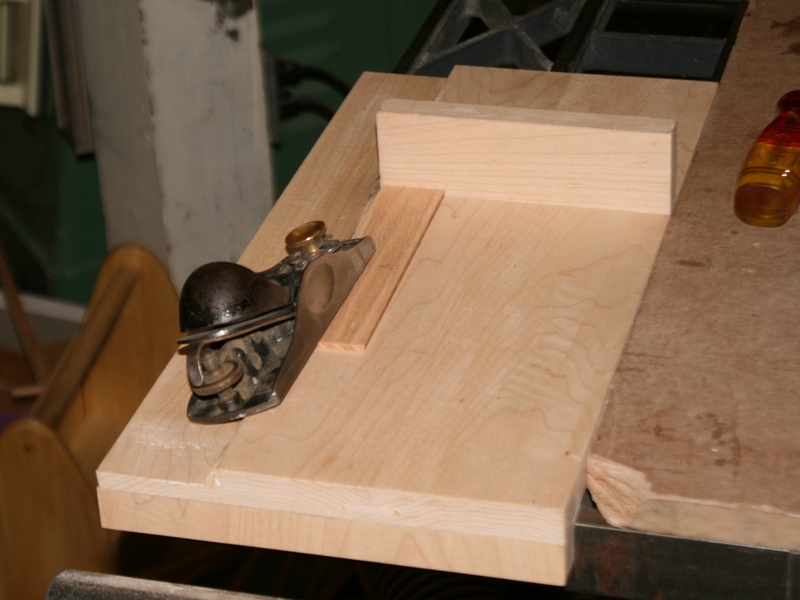
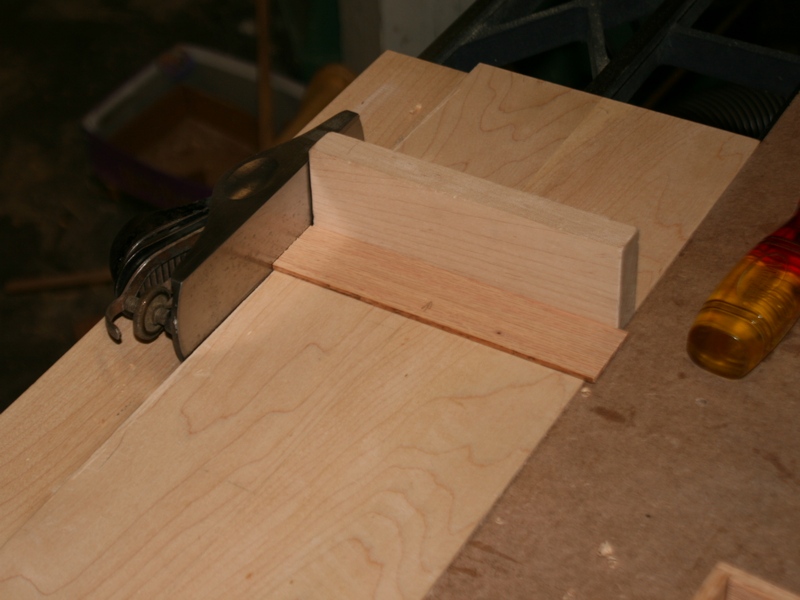
The strips usually end up just a little long, so I trim them to length with my plane and a shooting board. I trim all four pieces until they fit in the box pretty tight.
Take one of the inserts and make sure it fits in the box. Sometimes they need to be planed a little to fit. You want a nice slip fit.
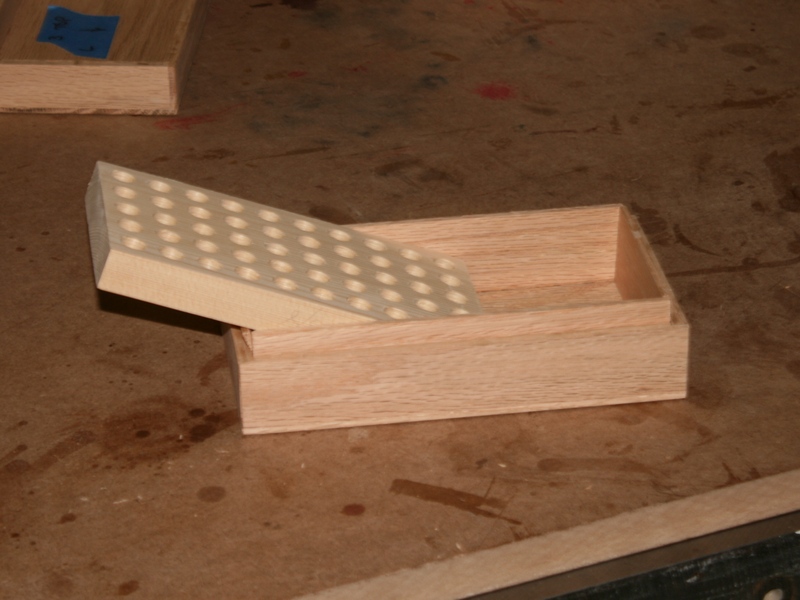

Then I put a small bead of glue on each lid retaining strip and stick them in the box. Next I put a small bead of glue around the base of the retaining strips and put the insert in and seat it fully. Don’t use too much glue or you will need to clean it out of some of the holes.
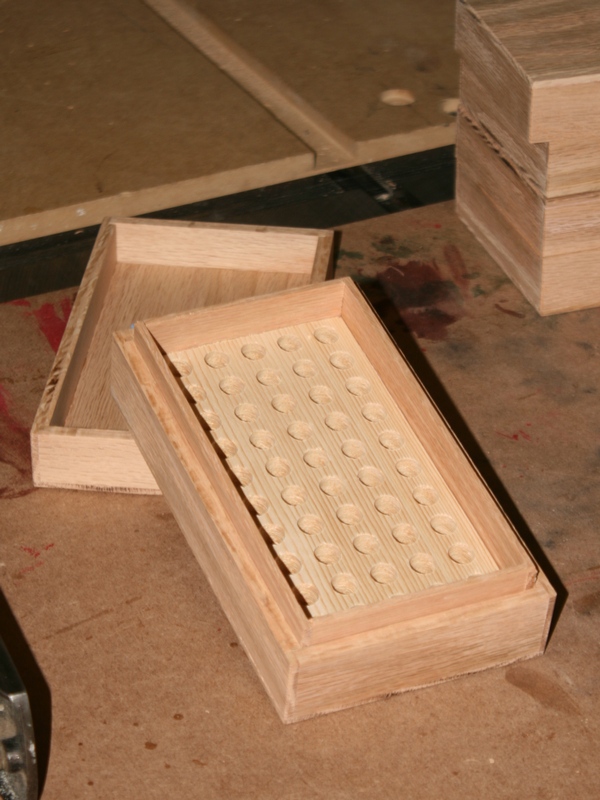
After the glue dries I take a chisel and pare a little off the corners of the retaining strips.
Apply whatever finish you like and you are done.
BTW – I sell these boxes and other wooden items in my Etsy Store. If there aren’t any listed then I am currently out of stock and should have more in a few weeks.